

How To Install A Binary Trigger
AllOutdoor Review: Franklin Armory BFSIII AR-C1 Binary Trigger Install
08.06.21

Recently I had the chance to review and work with the Franklin Armory BFSIII AR-C1 Binary Trigger. I got to do a bunch of range fourth dimension and even have a little walk through the forest which will go live in another article. Before I could do any of that I had to install it in a few AR15 style rifles. I figured a good installation article would assist some folks out there that are more visual learners. Allow'due south get to the bench!
AllOutdoor Review: Franklin Armory BFSIII AR-C1 Binary Trigger Install
1. Start matter is outset! Practice all the rules of gun safety. When disassembling and assembling a firearm you lot should always wear rubber glasses due to multiple parts being under spring tension. Triple cheque that the firearm is unloaded. Cheque the chamber, magazine, and the area in betwixt. I highly recommend reading through the included installation guide or scout an installation guide hither. All set? Let united states jump right into it!
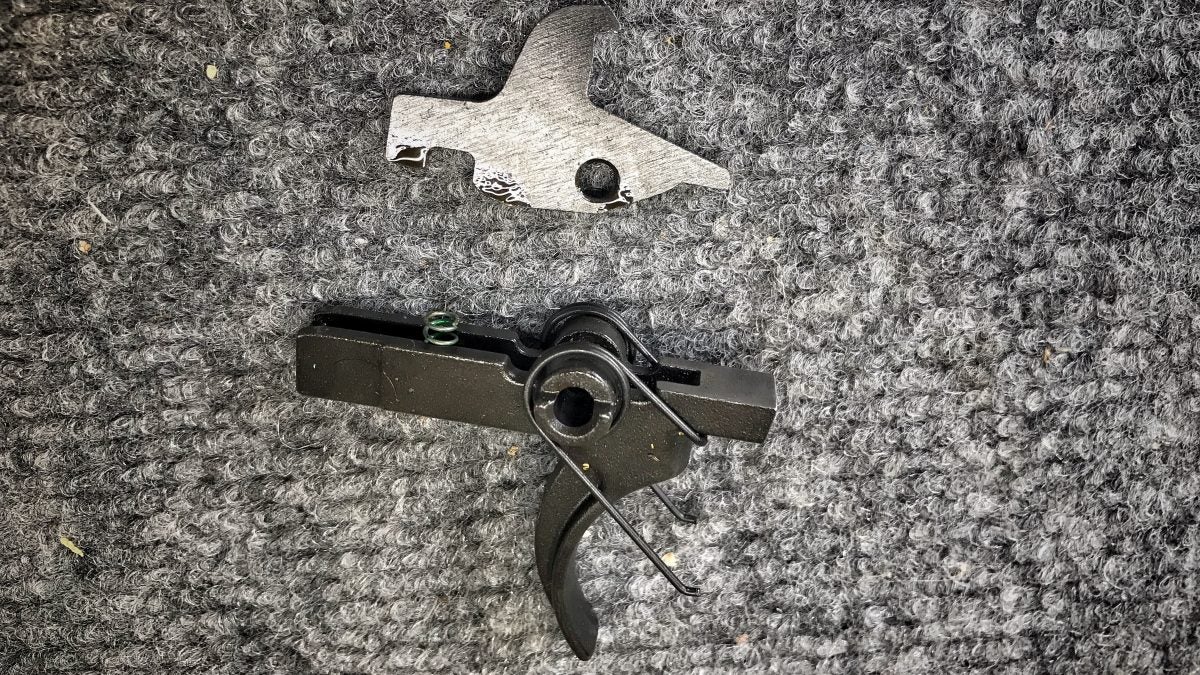
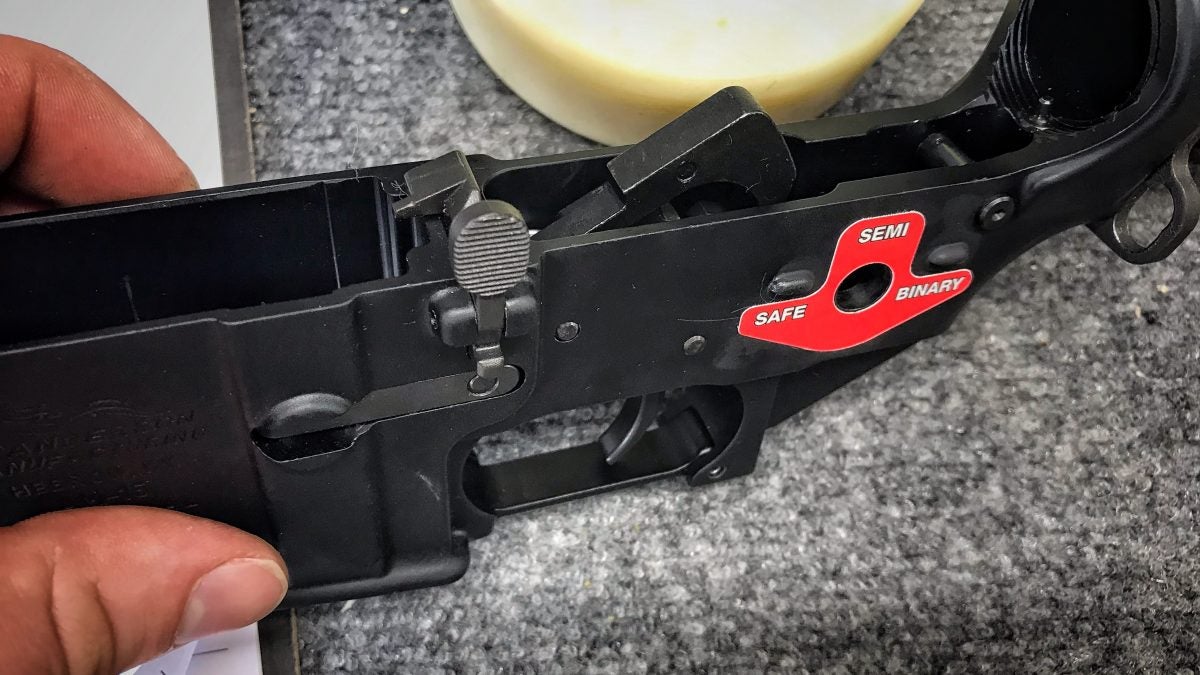
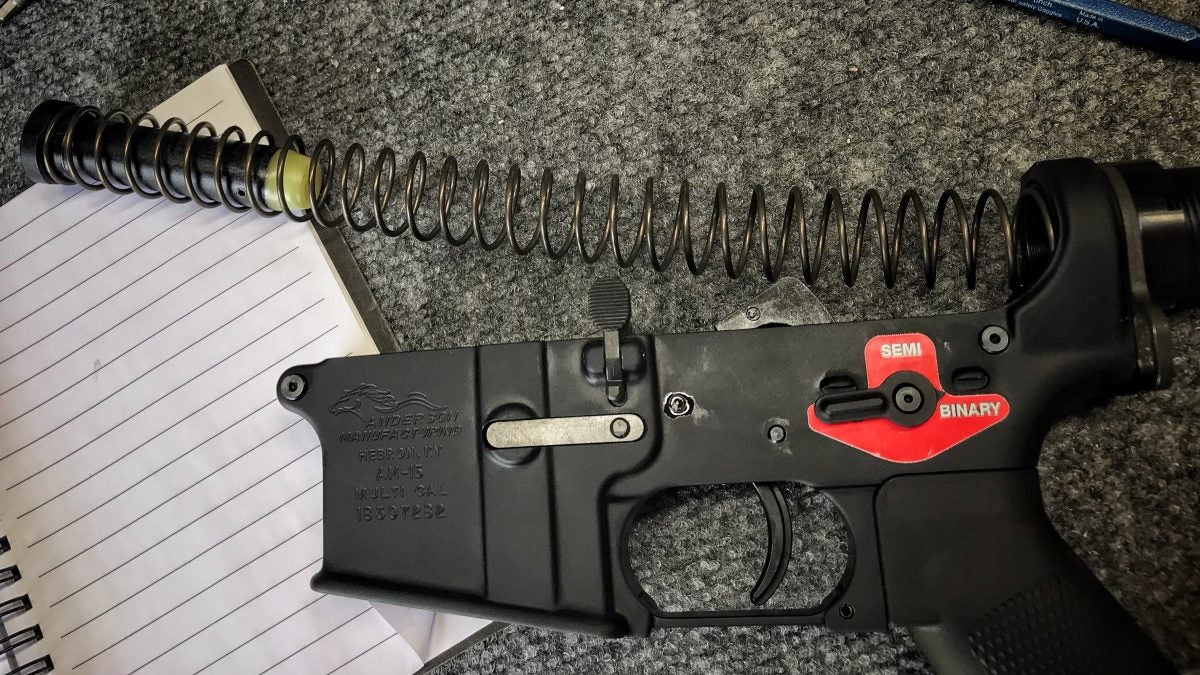
The BFSIII AR-C1 comes with the post-obit:An Assembled Trigger/Disconnector/Slave Pivot,Ambidextrous Rubber Selector, Firing Mode Sticker, Slave Pin (and actress), Actress Disconnector Spring, Two Buffer Springs (One is Stronger), Manual, Franklin ArsenalSafe-Semi-Binary Crimson Sticker.
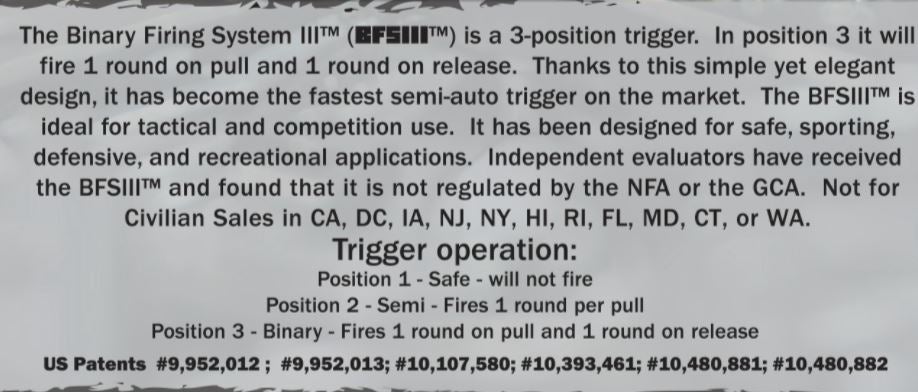
2. This part is optional. The BFSII AR-C1 includes two extra buffer springs. One is stronger than the other and this is due to potential cycling issues you lot may have with prolonged utilize on your mill buffer spring. Easy plenty but depress (The buffer is under spring tension be aware!) the buffer servant plunger and permit the buffer and bound come out towards the lower receiver. Pull those out and modify the buffer to a new spring and repeat the process in reverse to install.
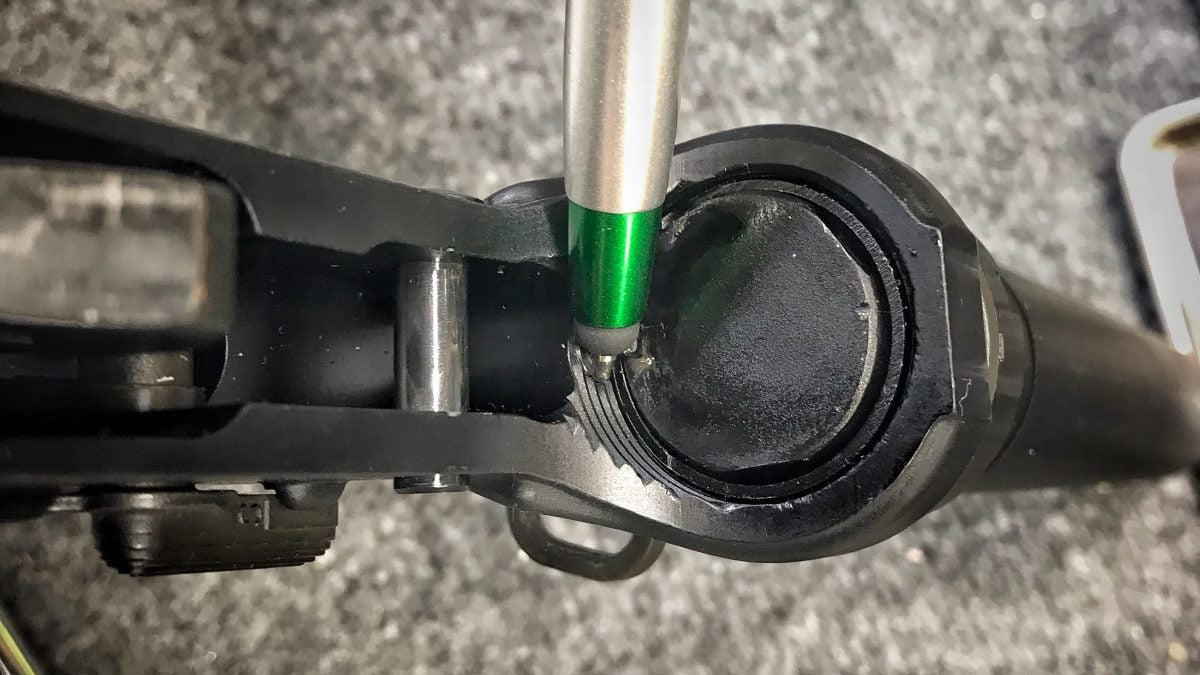
3. Assuming you already separated the upper from the lower, start by removing the pistol grip on the AR15. Use a 3/xvi hex chip/Allen wrench to unscrew the screw hidden within the pistol grip.
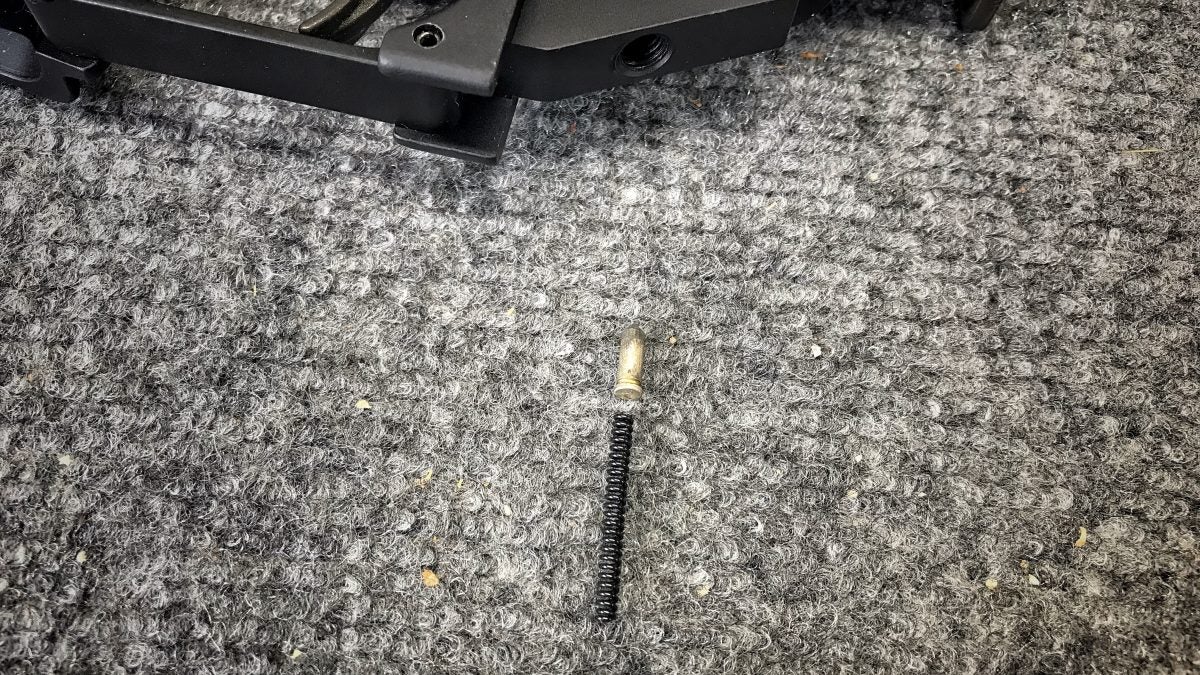
iv. Pay attention to the spring and plunger that is being depressed by the grip. They can autumn gratis from the lower.
I always make certain to take them out and then I do not lose them.
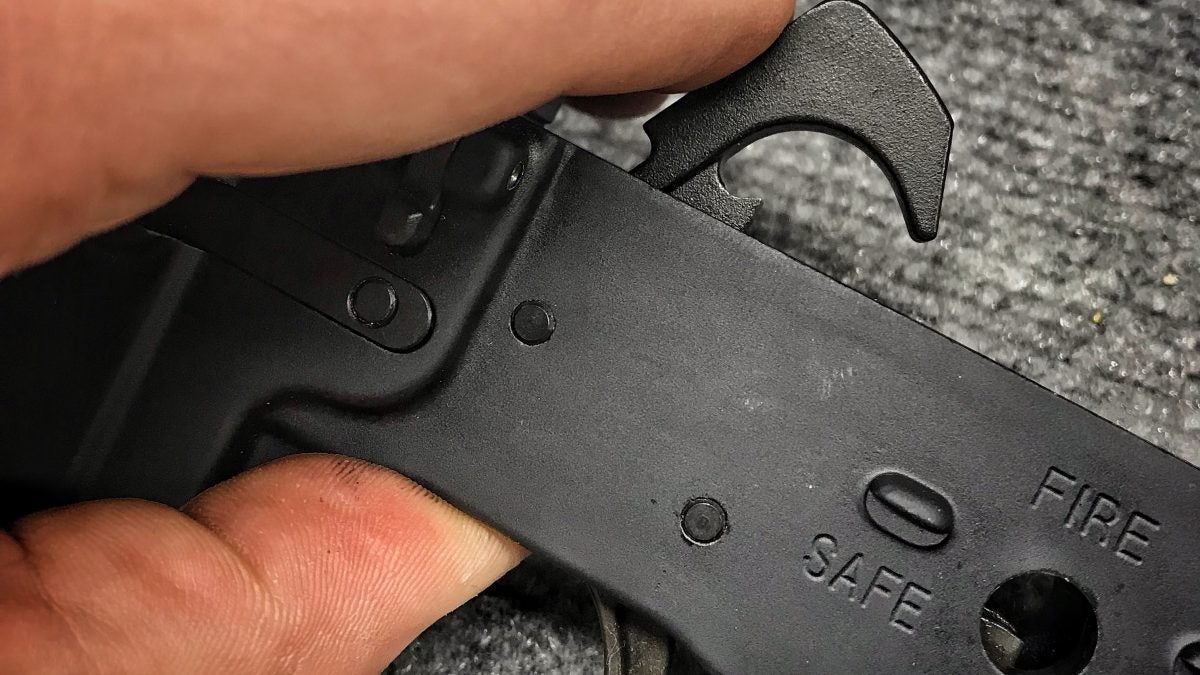
five. At present that the spring and plunger depressed by the pistol grip take been removed y'all can take out the safety selector. It may accept some twisting simply the selector can be rotated until it is able to be pulled free.

six. Now carefully allow the hammer to move forrad past depressing the trigger.
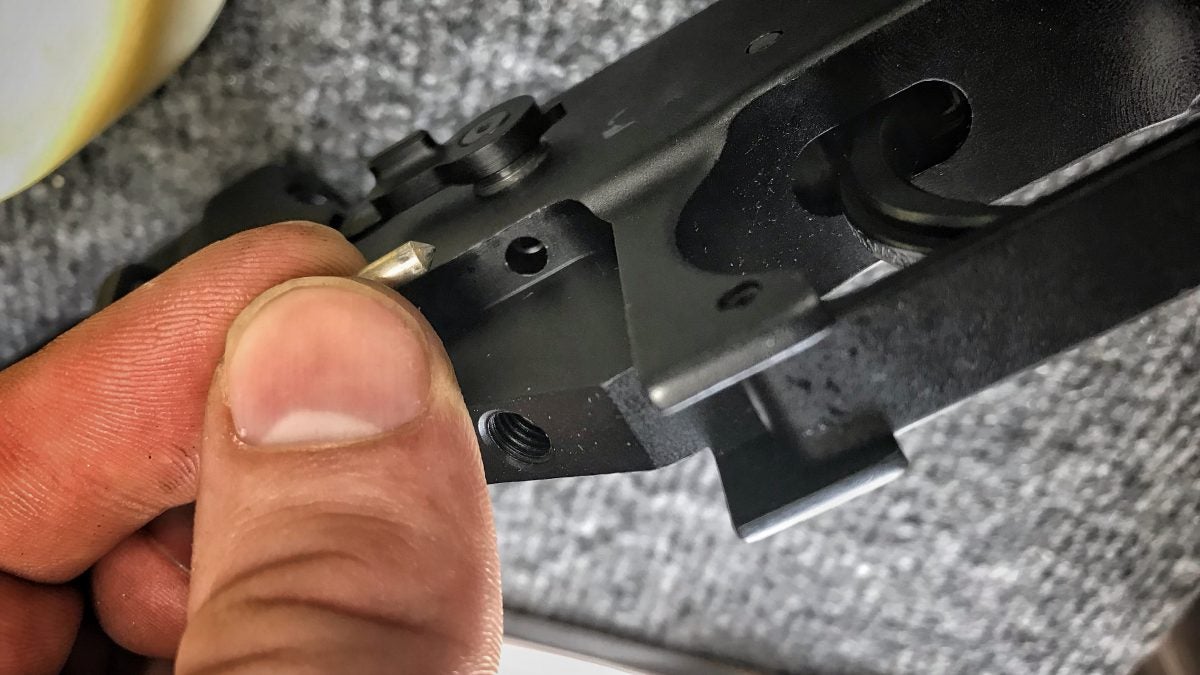
vii. With the hammer immune frontward you can now remove the pin property it in place. The pin can be driven out either way merely make sure to apply a bench cake or have this rigged carefully in a jig on a vise.
eight. Later removing your punch the hammer will start to dislodge itself. You can have it out but be careful of jump tension.

9. Now nosotros can remove the trigger pin. Before doing this admit that there is as well a disconnector under spring tension every bit well as the trigger itself which is besides under leap tension that will release when the pin is removed.
Encompass the top of the receiver with a rag or your hand to catch whatever may jump out.
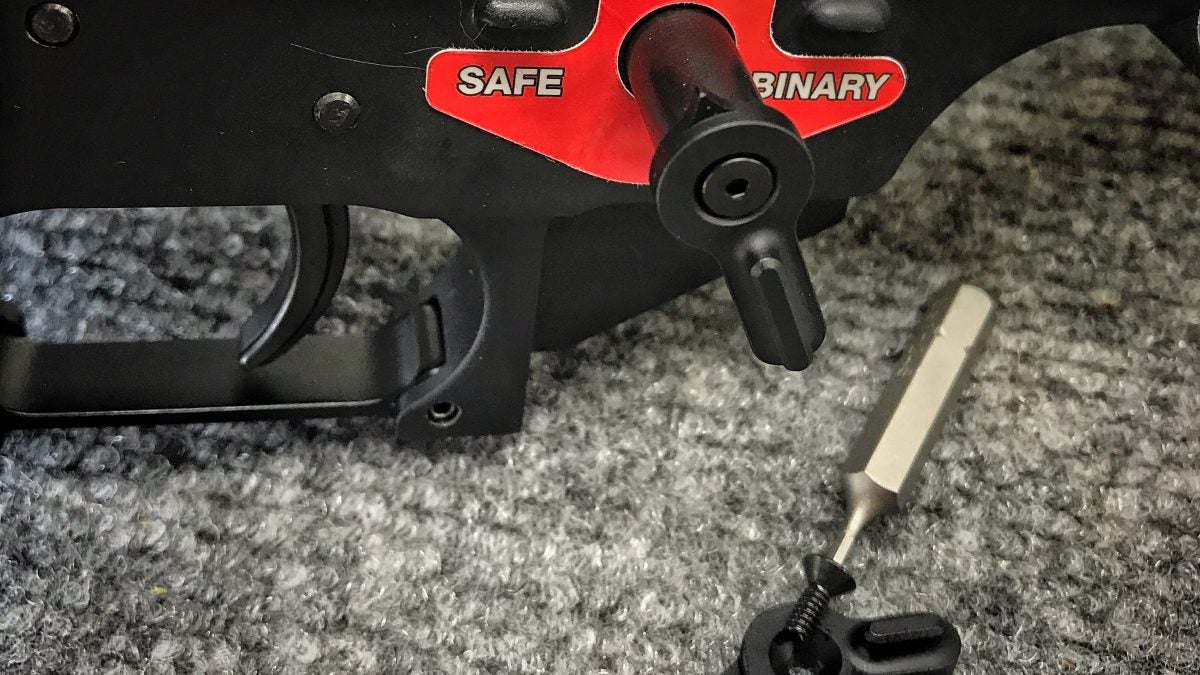
x. If you are applying the BFSIII AR-C1 sticker (information technology is recommended for safe reasons) prep the surface area by degreasing it. A small amount of acetone would exercise the job. Make sure to wipe off whatsoever spot that does not dry out.
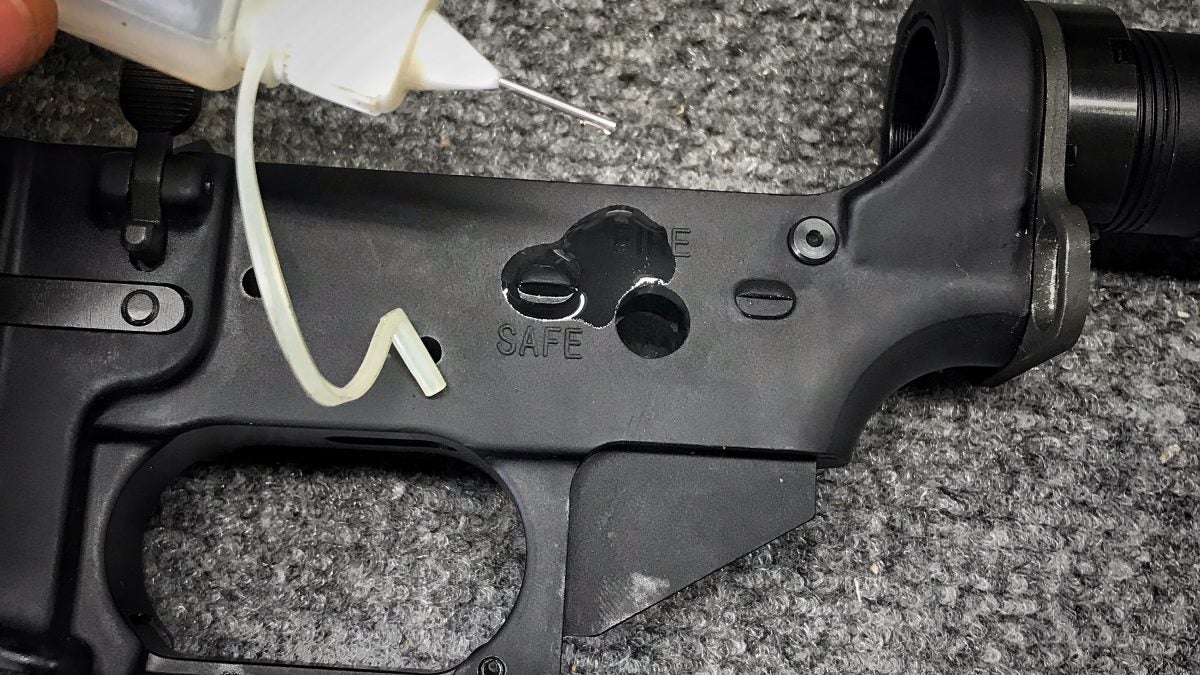
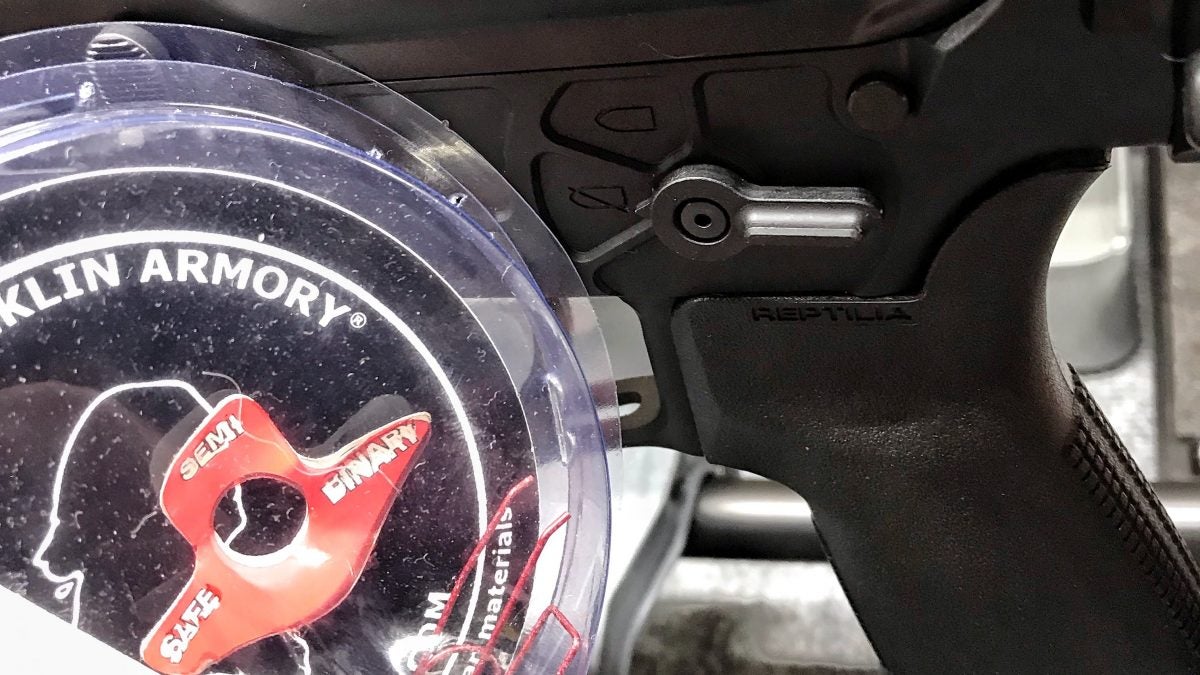
Note: Some lower receivers accept aesthetic features that make it impossible or unlikely to utilise the sticker. Such as this Springfield Armory Border PDW.
xi. Apply the sticker carefully. This may besides be a old try since the sticker will separate itself into two-layer is worked with aggressively.

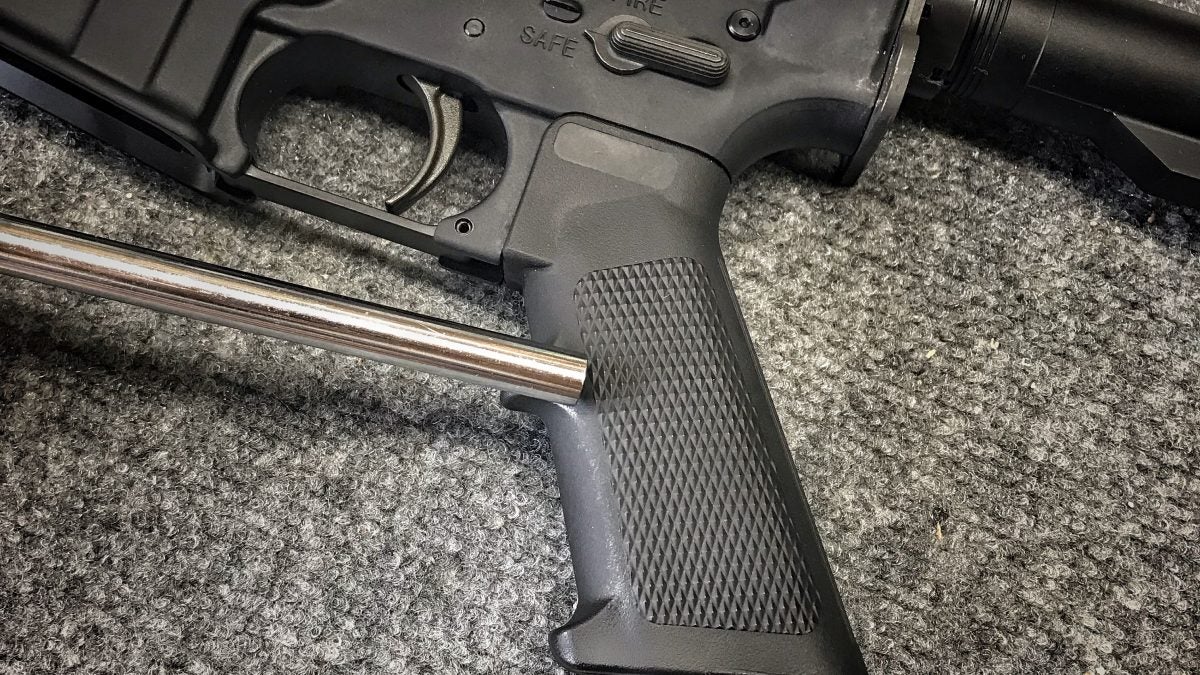
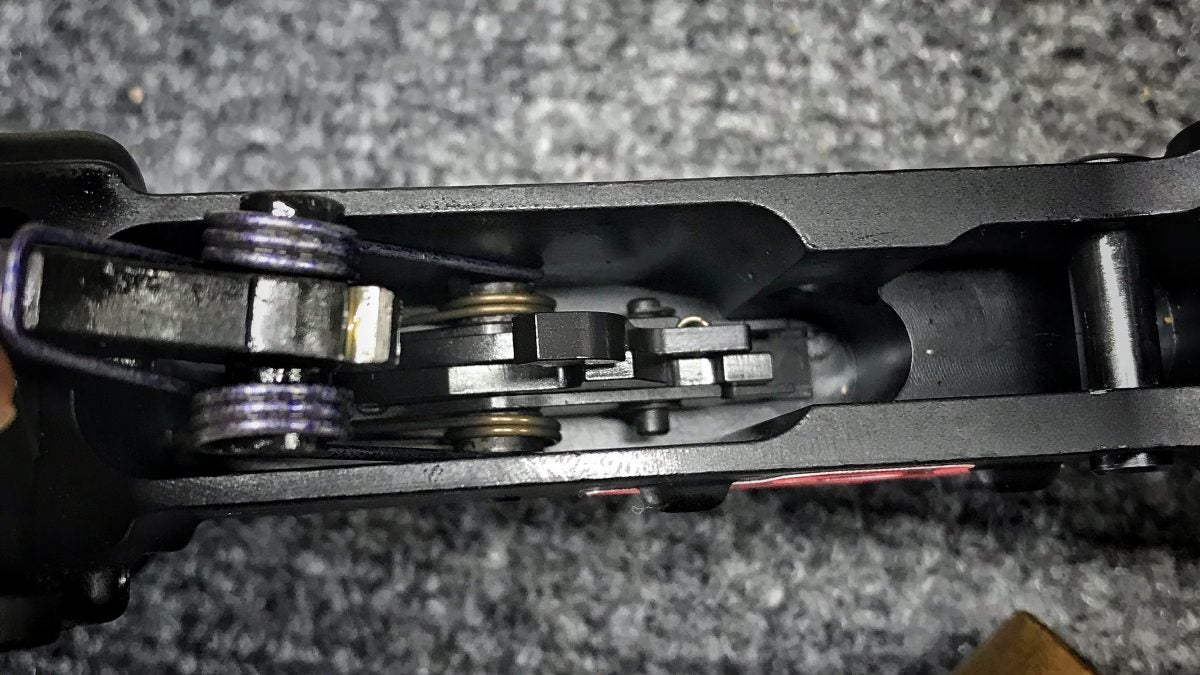
12. Now we tin can install the prebuilt trigger. Accept care not to dislodge the slave pin inside the trigger assembly. Put the associates into the lower in the configuration shown below. Brand certain to have the spacers on the trigger associates (more on that beneath).
Notation: Here we can run into the correct orientation of the trigger and hammer within the lower merely more importantly we can encounter the spacers and their correct orientation. Normal one-piece triggers have them built-in. The transmission says nothing of this which could really stump someone who is not used to this kind of thing. The spacers are for the hammer spring tails to balance on within of the receiver.

13. Installing the trigger is very easy. Fix the trigger down into the receiver with the spacers fastened and line the slave pin up with the pinhole. Insert a trigger pin and hammer the pin through to replace the slave pin.

xiv. At present that the trigger is installed the hammer can exist placed in. The springs should be placed so that they coincide with the cuts on the trigger spacers. The hammer will be under tension but needs to be pushed into the lower with ane paw and the pin it is to be partnered with inserted.
fifteen. From their cock the hammer by pulling it to the rear and it should lock in place.
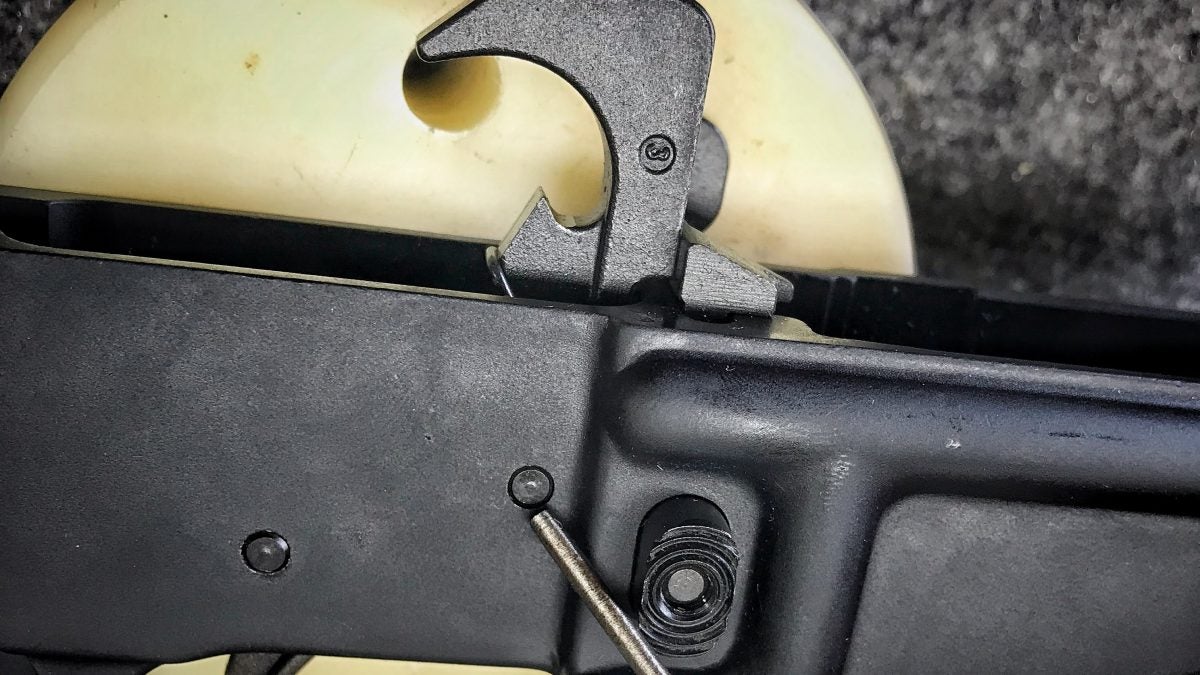
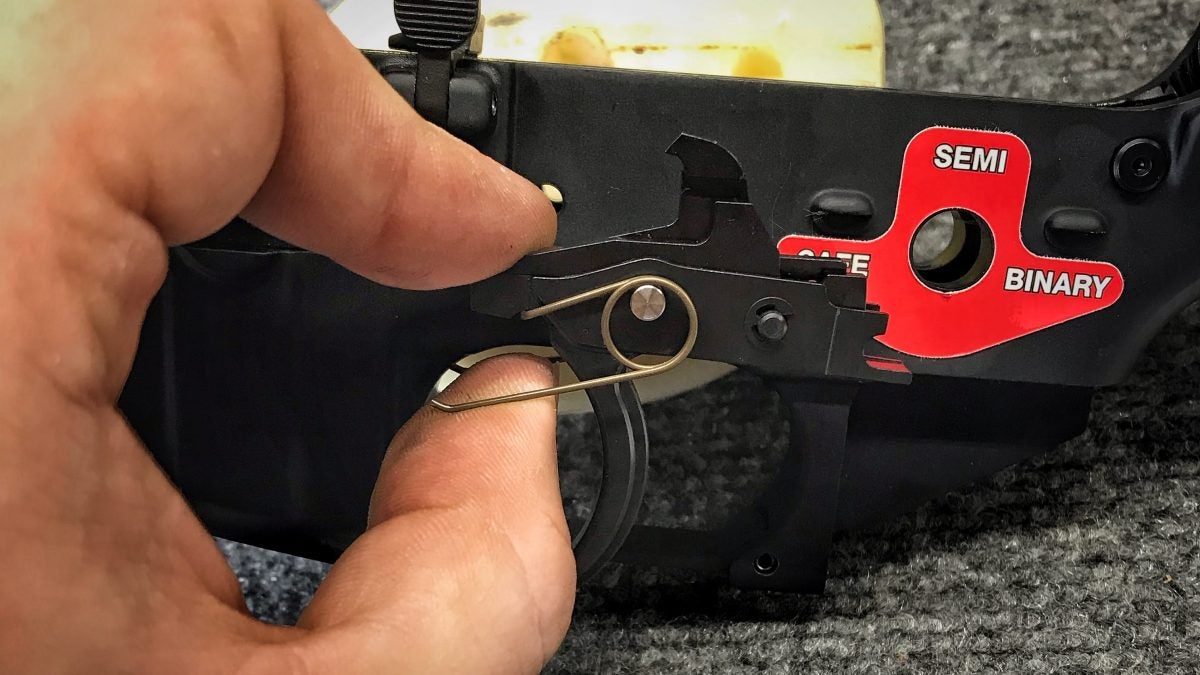
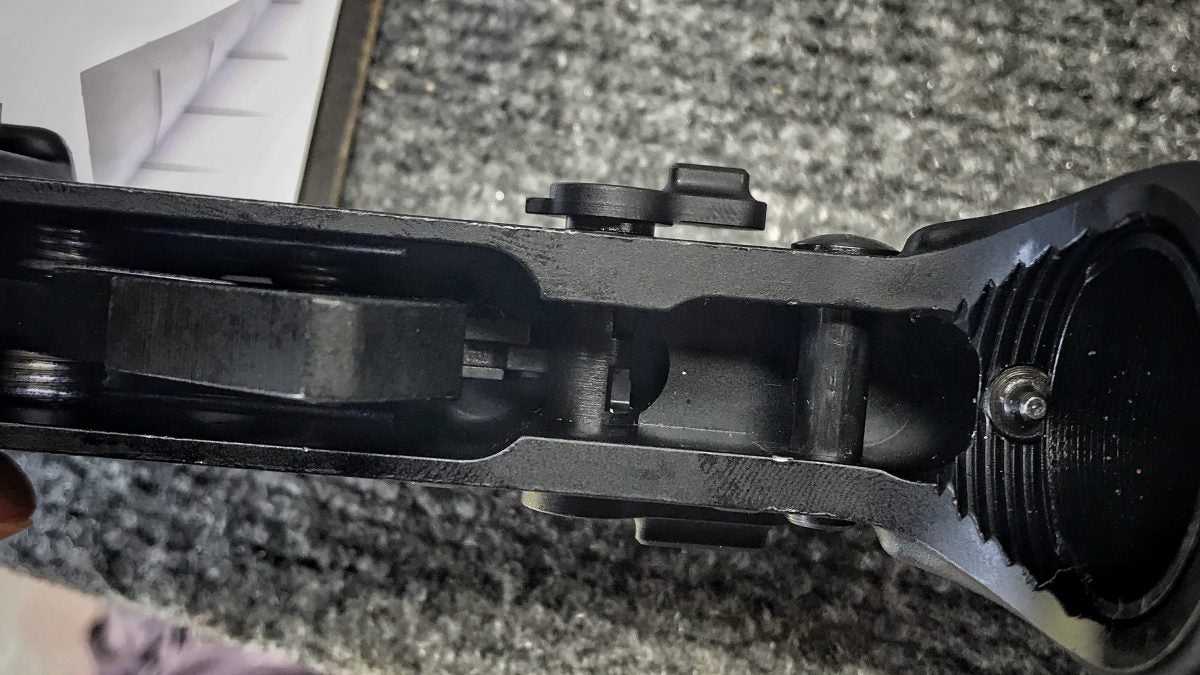
16. Now yous can insert the selector. The selector may been to be rotated here and there to go information technology to punch all the mode through. Spiral in the other side of the selector once its all the way through.
Note: The infinite betwixt the selector and the frame is normal and is well-nigh probable in that location to make up for larger infinite on different receivers.
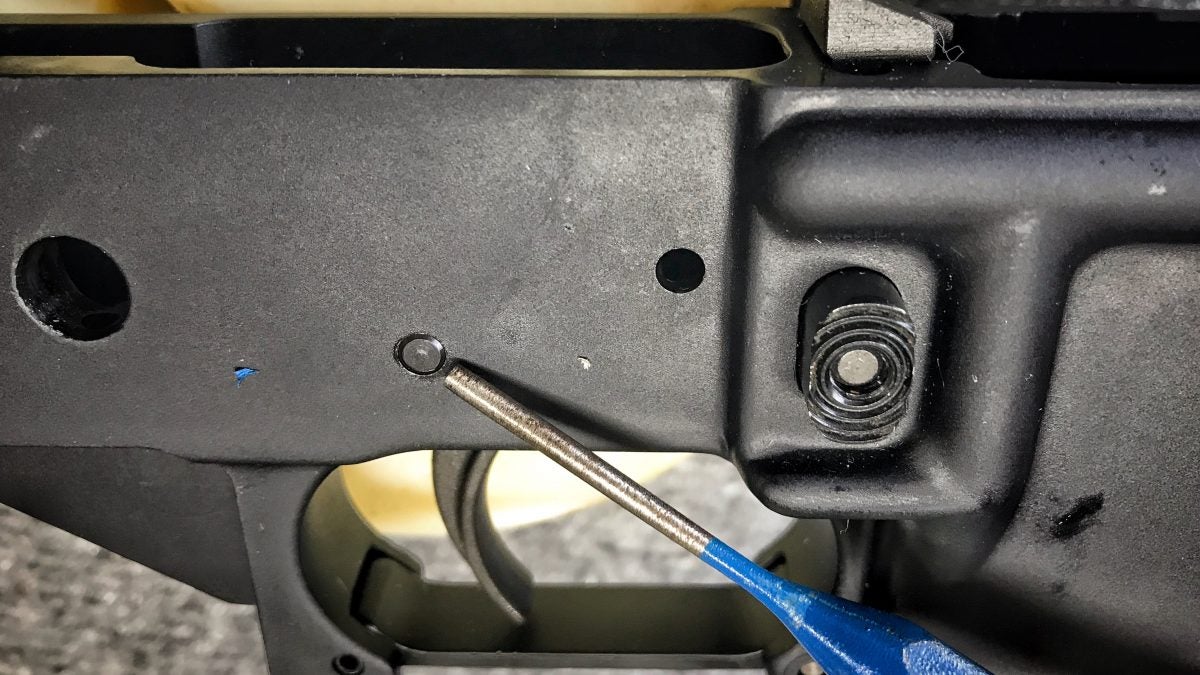
17. Now reinstall the pistol grip components. I usually turn the lower upside-down and put the plunger in and the bound on top before squishing information technology downwards advisedly with the pistol grip.
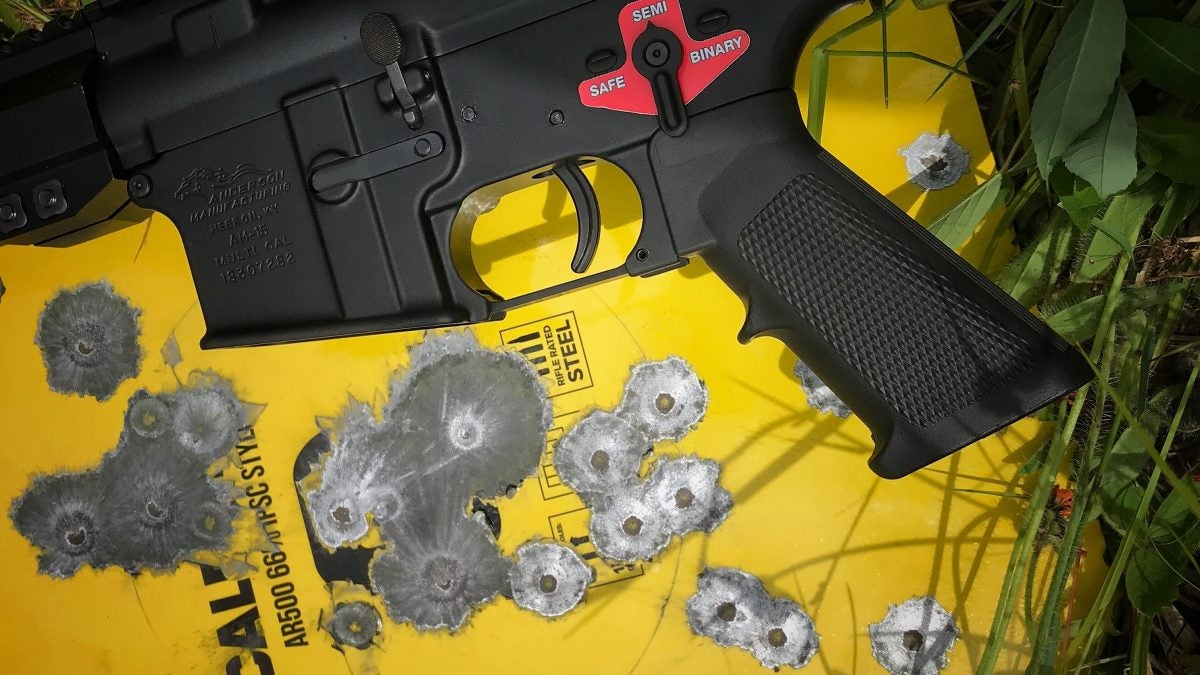
eighteen. In one case everything is back in place there is a long list of condom tests that should be washed earlier taking your BFSIII AR-C1 to the range. The safe list is located in the transmission or here in the install video. If for whatever reason you need to contact Franklin Arsenal'due south customer service for technical questions their phone number is 775-783-4313 (Monday through Friday 9:00am – iv:00pm PT).
In closing, thank you to anyone who tuned in and followed along! Brand sure to check out Franklin Armory and their products. I hope this was helpful and educational. Please always remember to practice proper gun rubber and to exist mindful of parts so that you do non lose whatsoever. Safe and happy installation!

Source: https://www.alloutdoor.com/2021/08/06/alloutdoor-install-bfsiii-ar-c1/
0 Response to "How To Install A Binary Trigger"
Post a Comment